Setting Image View
Image View modifies the aspect ratio of the TV image by stretching, zooming or adding gray bars. Since many TVs disable their aspect ratio controls when connected with HDMI, Image View lets you make sure the image fits properly on your TV screen.
To select an Image View setting:
Before you begin
To set Image View:- The accessory VS-2 video enhancer must connect the system console to the TV via HDMI.
- The system Widescreen TV setting must be Yes. For more info, see Using the Widescreen TV setting.
- If the system Video resolution setting is Fixed, the connected device needs to send a resolution of 720p or greater. For more info, see Setting video resolution.
Setting Image View from the remote control
Press the Library button (above the Settings button) repeatedly to scroll though the available settings.
Note: If your remote control is programmed to control your TV, the Library button might change the TV aspect ratio rather than the Image View setting. This will happen if the TV Control setting in the system menu is set to TV. In this case, change Image View from the system menu using the instructions below.
Setting Image View from the system menu
In the steps below, the system menu can be viewed on your TV screen and/or on the system console display.- On the remote control, press the Settings button.
If the system menu does not appear on your TV, be sure the correct TV input is selected. - Scroll down to select Image View (or VIEW on the console display).
- Scroll right to select the options.
- Scroll up or down to select a setting.
- Press the Exit button to exit the menu.
Image View options
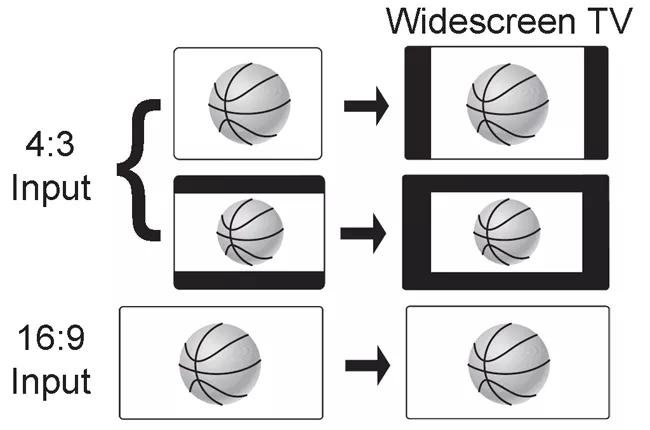
Normal: Image is unchanged
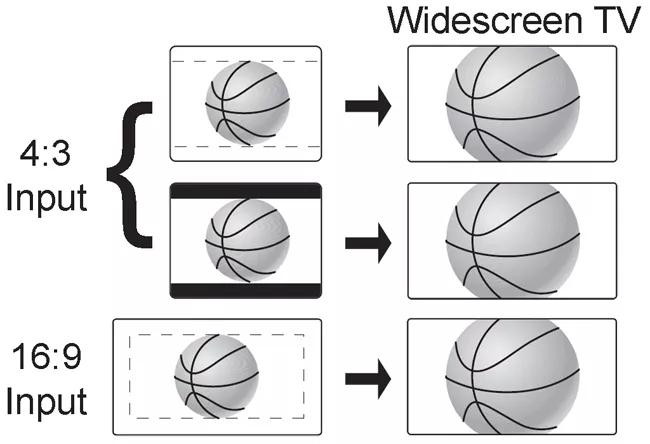
Zoom: Image size is increased horizontally and vertically to fit the screen

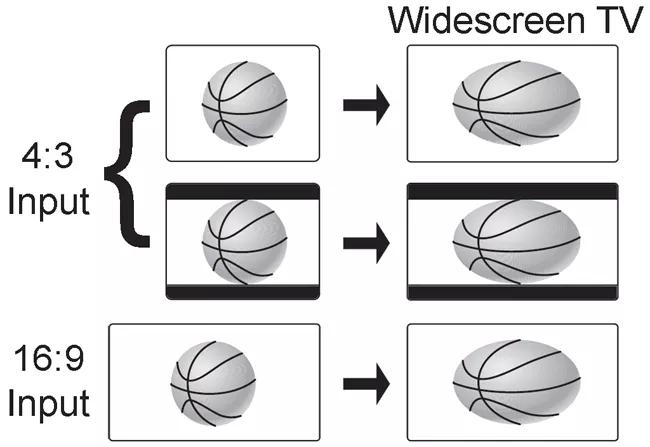
Stretch: Image is stretched evenly from the center

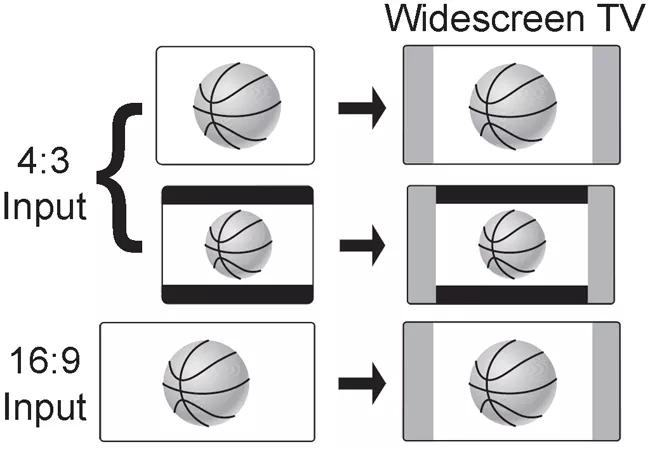
Gray bars: Vertical gray bars are added to the left and right sides of the normal image.


